 |
| Fresh out of our garden |
But int he meantime I have two other items that seem to creeping up faster and faster; Green Beans and Raspberries!

We have taken out about 1/4 of the bean plants out of the garden, and I pick raspberries every other day and get about 3-4 cups per average. I have been freezing the berries until now, and have made the most delicious jam ever! It is a great combo of peaches, raspberries, blackberries and a few rogue blueberries! I love it! But that is a story for another day.......
As for the beans, all they got was a little hot water and some salt, but none the less they turned out great! A blank canvas to create a masterpiece in the future.
Little helpful hints when canning:
1. don't be afraid to can! you can can just about everything! ("Can, can you do the can can, I can do the can, can, can you do the can? Oh yes I can, I can, I can"..... as sung by that great duo of mine to the tune of The Can-Can.... my girls!)
 |
| Photo found on Google Images |
2. Be sure to set aside plenty of time. You cannot rush this process, and when you do, your results don't turn out the same.
3. Pressure canners are not the devil!!! (ok an exaggeration but they can seem scary!) JUST REMEMBER TO RESPECT THE PRESSURE CANNER!!
4. Don't forget to take into consideration of high altitude changes.
Basic instructions on canning fresh green beans:
 |
| Yumm! Grean Beans!! |
Before starting I always put my lids and rims in hot water and let them simmer until I am ready. I believe this is also suggested in most canning books.
Fill jars (I use quarts most the time because there are six of us!) within 1 1/2" from top with your beans. I shake the beans down to get a few more in if possible. Cover the beans with boiling water leaving 1" head space. Add 1tsp salt to beans. Take a knife and slide it down through the beans to remove air bubbles. Then take a clean cloth, wipe the rim down and the threads so there is no food on the jar when closing them up. Close up tightly. My books say "finger tight" but I always put one more firm twist so nothing gets out!
At this point most canning in pressure canners will vary. For quarts, you would can for 25 minutes at 11 pounds of pressure. But keep in mind this is for up to about 3500 ft above sea level. I have to increase my pressure to 12 and cook about the same time. For pints, same pressure but you process only 20 minutes.
*with pressure canners, your time processing does not start until you hit your pressure level. This could take a half hour or more before it gets there. I am no expert so please refer to your canning manual for specific details!!!
You can spice up your beans and add different flavor enhancers such as garlic, red peppers, onions and more! The possibilities are endless!
 |
| Fresh Bush Beans Canned and ready for storage |
Next project:
http://greenlitebites.com/2008/01/20/spicy-black-beans-and-zucchini/
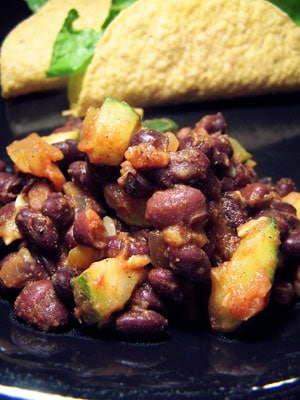
Going to take this recipe with Black beans, zucchini, and salsa and can it to make a great bean dip for any occasion! It is also an amazing replacement for a meat filling in soft taco's! All I will have to do is open, heat and serve!
No comments:
Post a Comment